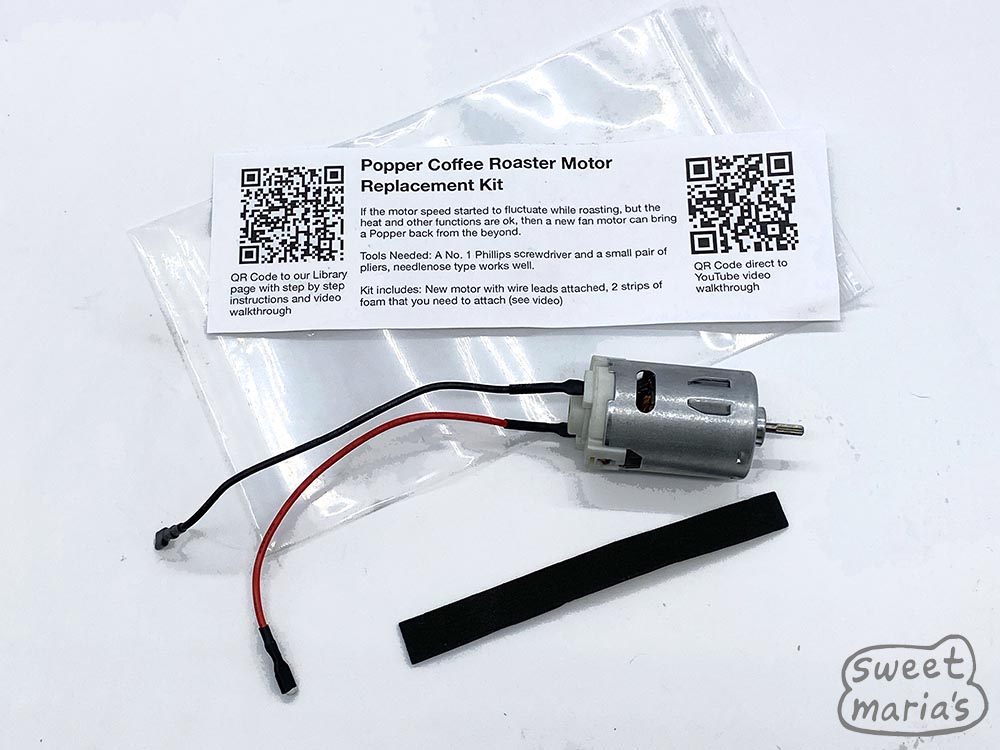
Replacement motors are available at Sweet Maria’s now (June 2023)
Finally, the replacement motors for a DIY rebuild of the Popper coffee roaster are here. I created a video on Sweet Maria’s you tube, and there is more information, plus the link to get a kit, on the SM Coffee Library page. And here is where you get the motor kit for $5 .
Listed instructions from the Video Captions
If it’s helpful, here are the instructions listed out, as they are shown in the video. If there is extra clarification you need or a photo that would be helpful, please comment and we will try to add that.
1- remove the 4 rubber feet to reveal screws beneath.
2- remove the 2 larger front face screws with the No. 1 driver.
3- remove the 4 screws under the rubber feet to release the base from the body shroud.
4- separate base from shroud gently tilting at angle toward the the ribbon wire
5- disconnect ribbon wire and put the body aside.
6 – remove thermal switch connectors and remove insulation jacket.
7 – remove 3 screws holding roast chamber assembly to base plate
8 – remove 3 machine screws holding white fan shroud to metal roast chamber.
9 – remove 3 ceramic spacers to prevent damaging them.
10 – pull the fan off the splined motor shaft
11 – remove 2 small motor mount machine screws – motor is free now
12 – pinch the insulation above the spade connector to help release, while gently pulling side to side and upward.
13 – apply the 2 strips as in the video, not covering any openings in motor casing
14 – insert motor back into white housing, lining up holes in motor with where the 2 mounting screws will go.
14a – (oops) reattach motor with 2 screws, and tighten while pushing motor in place from the back. Don’t overtighten…
15 – push fan down with firm even pressure. test that it moves smoothly
16 – replace ceramic spacers. (added: These are very important to hold fan and heat coil in proper position!)
17 – replace 3 machine screws holding metal chamber to white motor mount.
17a – (added: You will be connecting the red and black wires on the new motor back to the PCB board exactly as they came off; black wire on the lower connector, red wire on upper connector. If you reverse these the motor functions but cannot roast much coffee because (I am pretty sure) the fan will be spinning backwards!
18 – slide thermal jacket on and re attach connectors to thermal switch, pinching them on if they feel lose at all. (added: if they seem loose at all, crip them on a but with pliers. If they aren’t well connected, full power is not getting to the heat coil, and your roasts will take too long / bake.)
19 – Inverting popper, attach base to chamber with 3 screws.
20 – reconnect ribbon cable.
21 – Reseat the shroud on the base, keeping one hand in top hole of roaster to guide it. Don’t force it!
22 – Replace the 2 larger front screws and 4 screws under the rubber feet, and replace rubber feet.
23 – Test your work… hopefully that motor purrs at an even clip and you have 250+ roasts more…