Popper Coffee Roaster Has No Heat?

The Fix Could Be Simple! A connector may have come loose.

In the last month we have seen a few Popper roasters where they start blowing cold – no heat. The function seems fine, the fan blows strong, but there is no heat.

This was something new, and when we looked at the first unit, the fix was so simple. One of the connectors that goes to the thermal switch on the side of the roast chamber had simply come off.

I am not sure why this would happen, but in each case the fix took less than 5 minutes. Most people might be interested in doing this themselves so here is what is needed:

  1. Get a small phillips head driver, number 0 or 1.
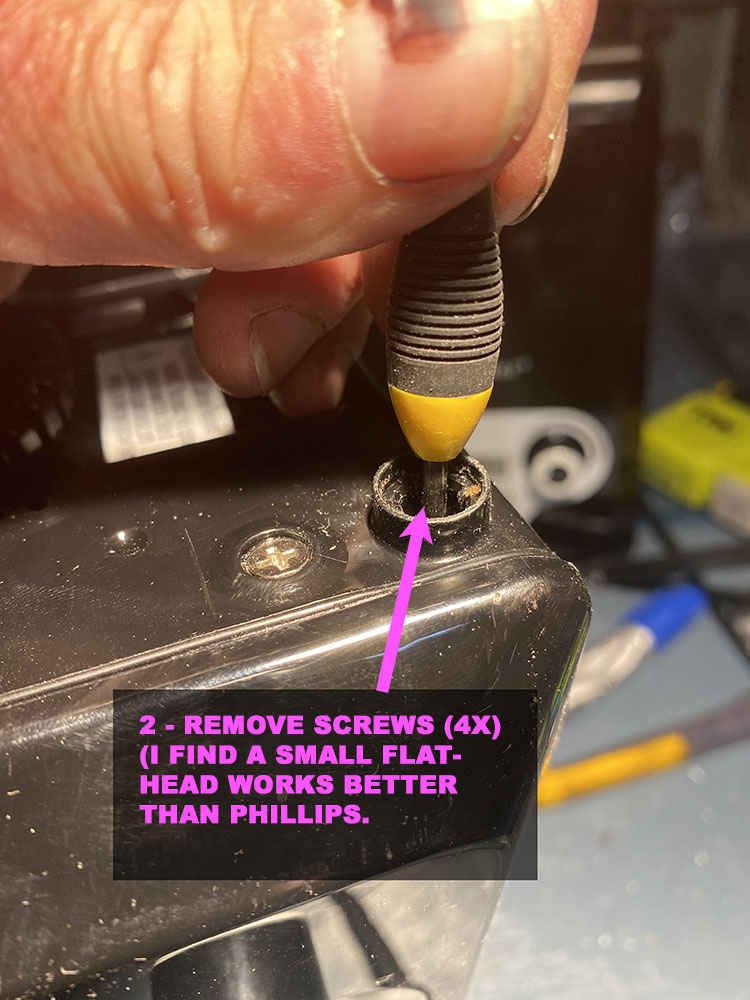
  2. Pop off the 4 rubber feet on the bottom of popper. See Image Below
  3. Loosen the screws under the rubber feet (I leave them very slightly in, as it makes reassembly faster)
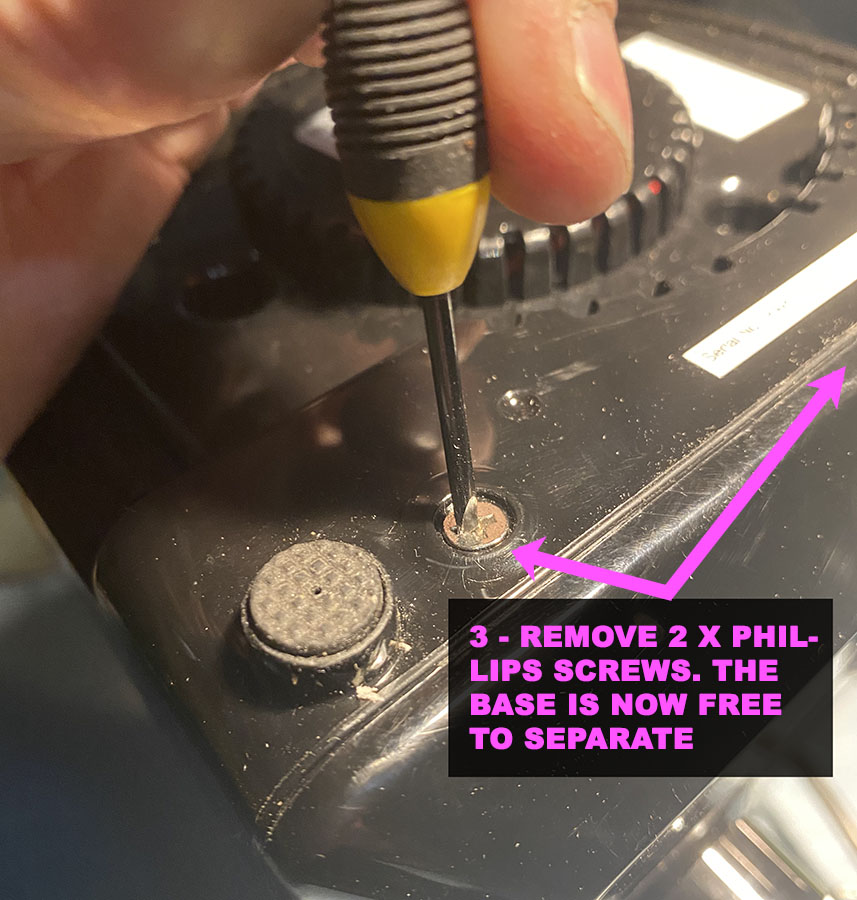
  4. Remove the 2 screws on the bottom of popper along the front .See Image Below
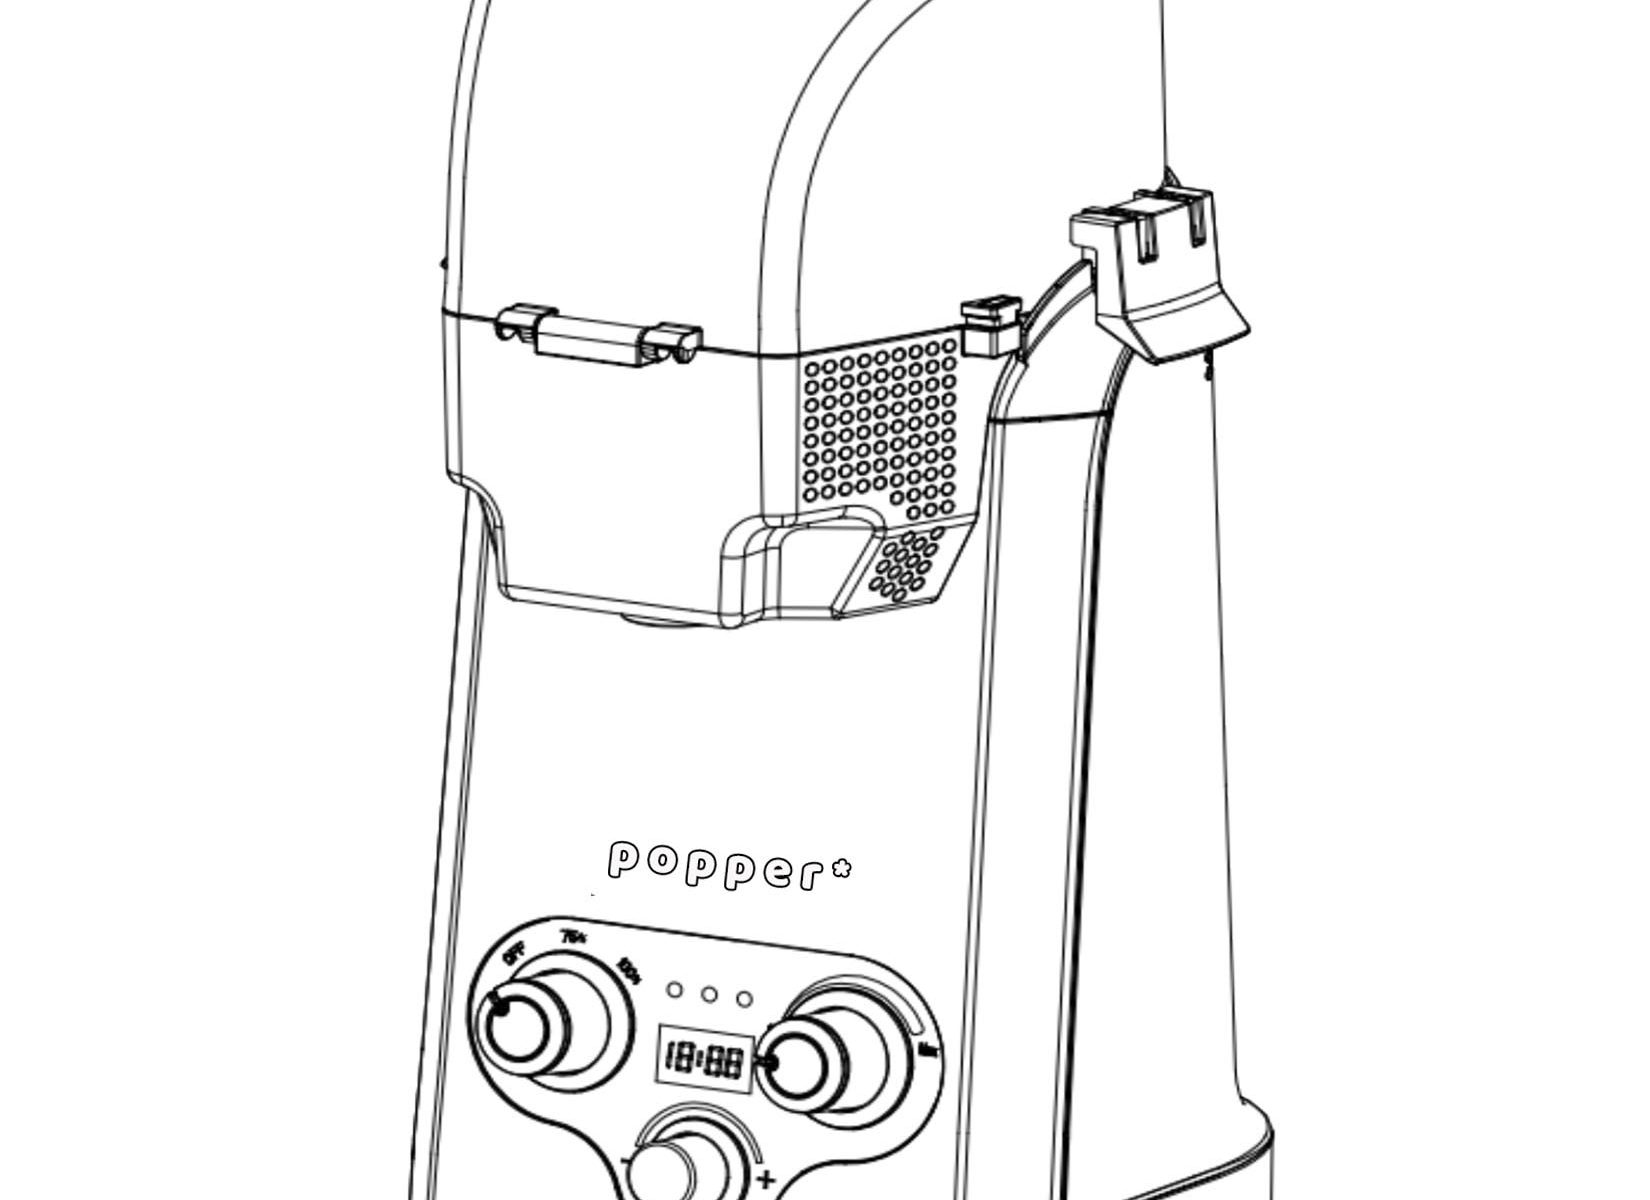
  5. Ease the Popper shell off the base – there is a ribbon cable attached but you can wiggle the shell off without undoing it. Don’t yank on it!
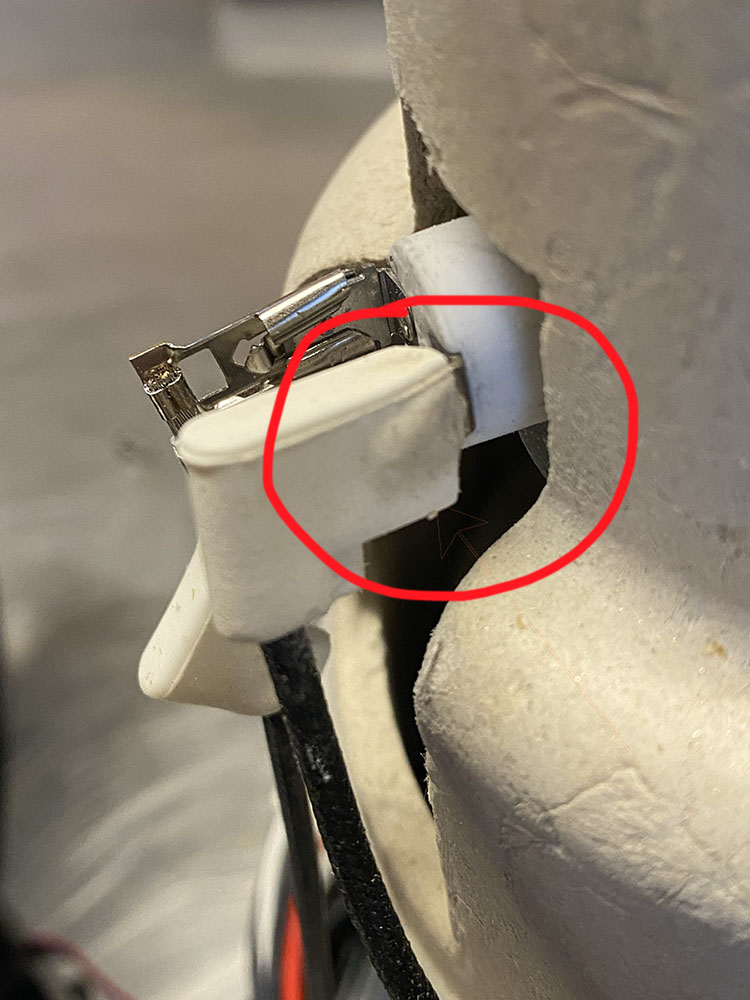
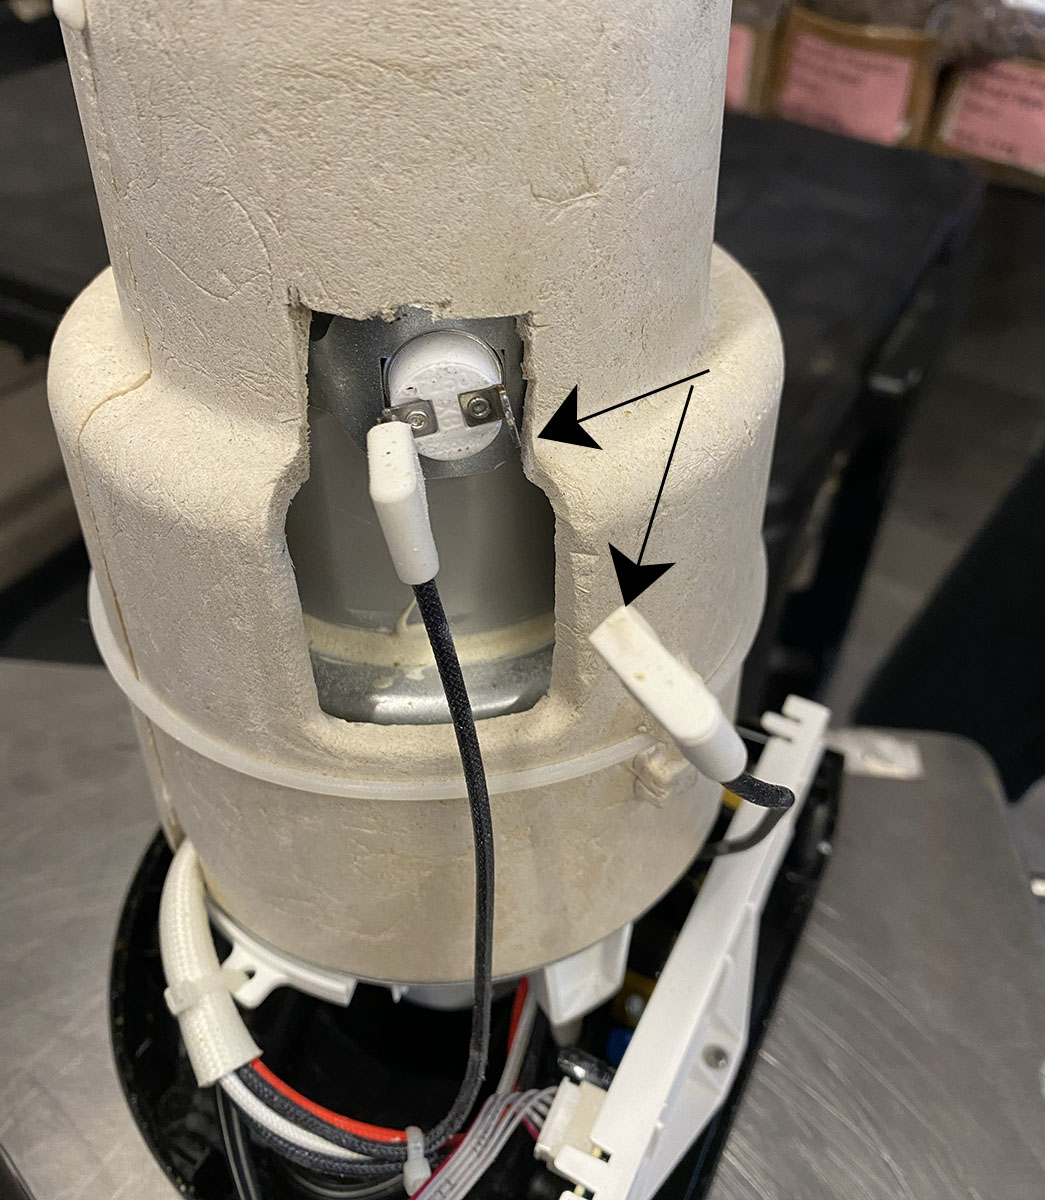
  6. You will see the 2 wires going into the thermal switch on the side of the roast chamber, through the opening in the foam insulation shield. See Image Below
  7. Is one off? Loose? Slide back the silicone cover and reattach the connectors. Crimp them on securely with pliers.
  8. Note that sometimes the silicone boot is discolored or heat damaged, These aren’t really critical to the function, so I usually remove them altogether. See Image Below
  9. Reverse the steps to reassemble and you are done!

Some things take time, like manufacturing a coffee roaster …

Popper is a coffee roaster

popper*, the coffee roaster was right on the verge of going into production.

… but one thing just wasn’t right. The factory had sent sample after sample, but the fan speed (and therefore the air flow) was not consistent. This impacted the potential batch size.

A late night video chat with the engineers in China made it clear to me though. They were testing under the principle that the roaster should not use the entire pre-programmed roast cycle of 7 minutes. They thought of 0 to 7 as a range so they were presupposing what I wanted was a 4 minute roast!

Well, a 4 minute roast is easy in a popper, but it’s rarely an ideal roast time. In fact, the whole idea of *popper is that the user can fluidly adjust roast time up or down on the fly. It’s a manual, low tech machine, unless you want to get in there with an arduino interface etc.

It’s a machine that rewards people who want to play around with the variables, so it’s simple to do a 7 minute roast just to first crack and add 2 or 3 minutes for development. You just have to be there and tend to your roast, make intuitive decisions and turn a knob. Simple.

(For me I actually feel the 7 minute pre-set roast time can work very well. For City roast I target 5:30 to hear the start of first crack, and the remaining 1:30 for further development. Remember, roast time is relative to the device and the type of thermal transfer. Higher air flow and more movement of the mass means more rapid levels of heat transfer via convection.)